Sunday, July 31, 2011

Crush Box

With these warm temperatures, I figured it was a good time to do some bodywork so I started with the crush box.  For those that don't know, the crush box is at the very front of the car and is really part of the nose.  One of the sides of the crush box had a buckle in it so I used a hammer and dolly to straighten it out. 


I also used the grinder with the wire wheel to strip the paint.


Since this car was a winged car and I'm making it a non-winged car, the next thing that I wanted to tackle was to fill in the wing bar holes.  The aluminum was counter sunk where the wing bar holders were mounted so I again used the hammer and dolly to flatten those out.


The next task was to cut out pieces of aluminium to fill in the holes.  The crush box is made out of 60/1000ths aluminum and I had 50/1000ths so that worked perfectly.  I used another piece of aluminum to put behind the holes and pop riveted the pieces on using countersunk rivets so they would be flush.


I used the same method to fill in some smaller holes and then used some lightweight body filler to fill in the holes and rivets.  I went ahead and filled in all the rivets on the sides since I already had the filler mixed.


I may end up putting a thin layer of "Icing" on the sides before it gets painted but this is good enough for now.

Saturday, July 30, 2011

Removing The Belly Pan

I have learned that the belly pan is a very important part of the chassis because it helps keep the chassis stiff and can make an important difference in an accident.  Belly pans are not only riveted but they are also bonded to the chassis with a high strength adhesive.  So, in order to get it off I had to drill out all the rivets and then get the adhesive to release.  But first, I had to flip the frame over and I was alone for this task so it was time to get resouceful with my engine hoist.  Here, I have seperated the transmission from the chassis.


And now the real challenge!  I grabbed the frame on the side with the engine hoist and lifted so that it was now on it's side.


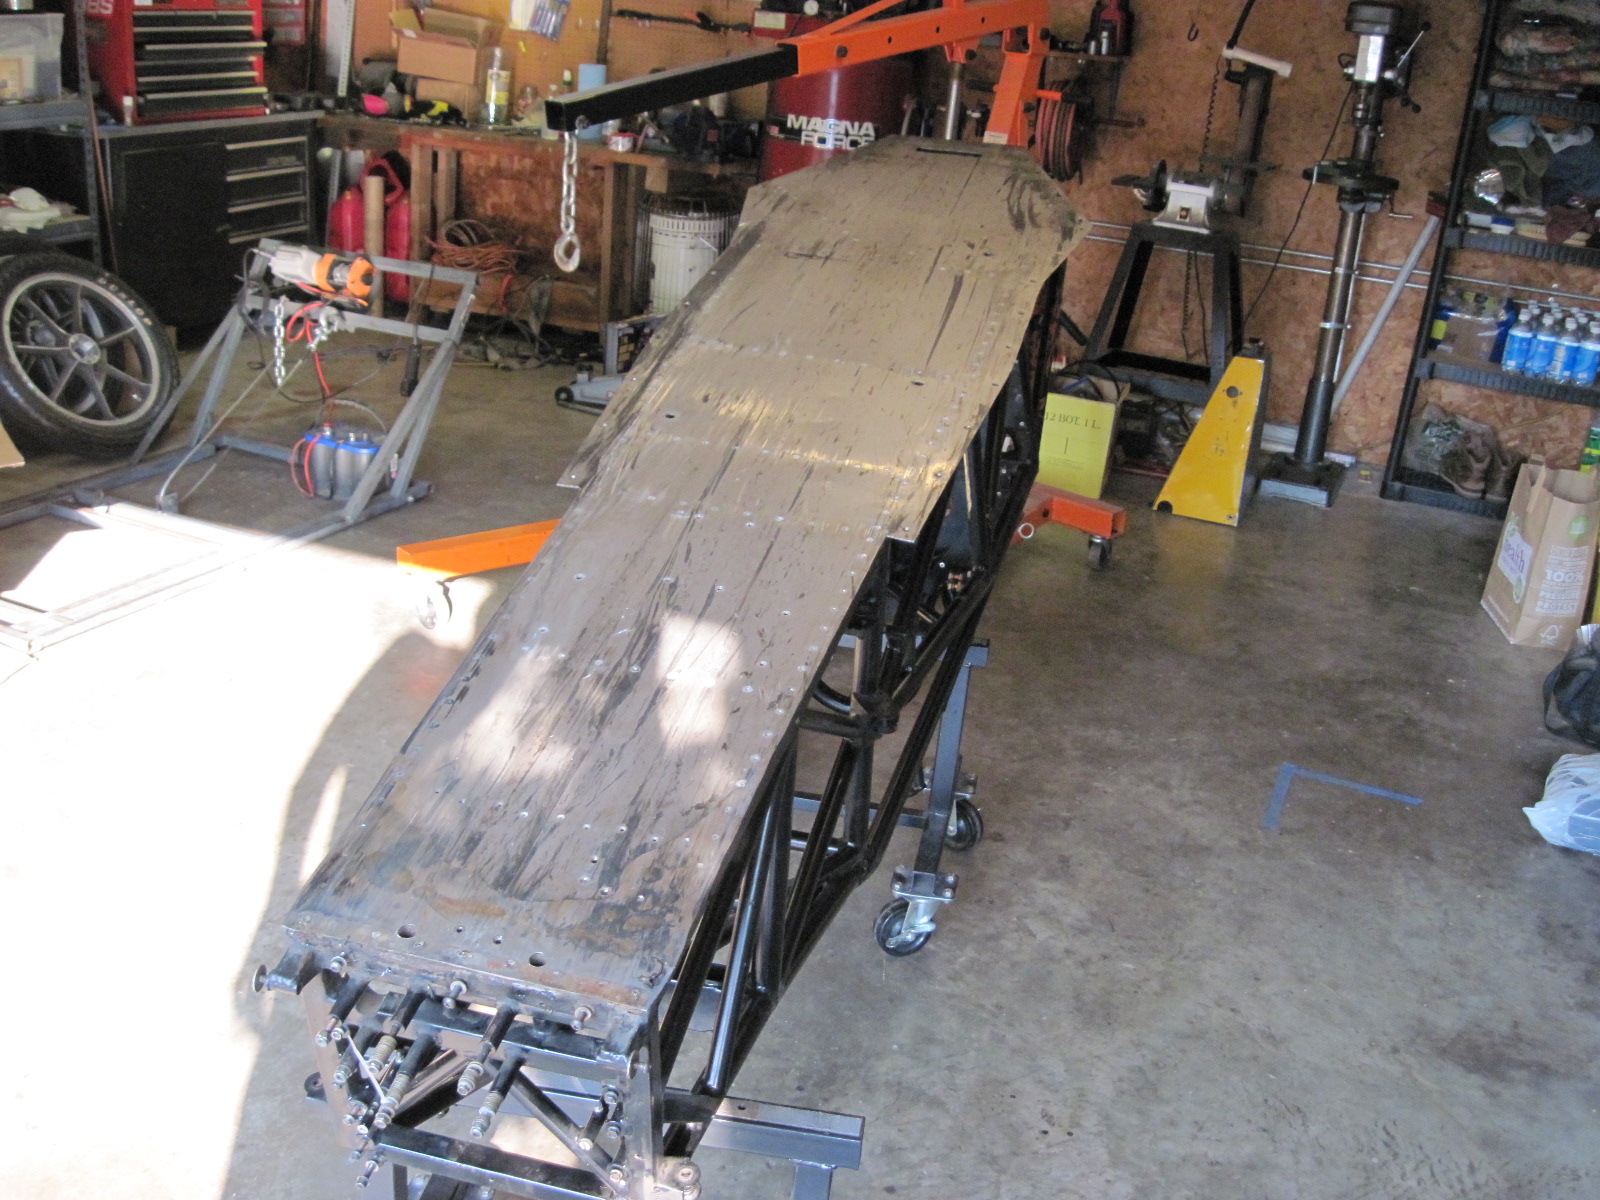
Half way there!  I then used the hoist to grab the frame at a point where I could continue to rotate it.  And then it is upside down so that I can get to the rivets.


Eric Langbein told me to be very careful drilling out the rivets because the holes in the frame should not be disturbed -- assuming that they are perfectly round and re-useable.  He also told me to use a small punch to push out the mandrel of the rivet so that the drill bit is easily centered on the rivet.


There were well over 100 rivets so it took a while to finish the drilling.  Not all the rivets were the same size so I had to use different size drill bits always being careful to not get into the frame.  All I was really concerned out was getting the head of the rivet off.  After I got done with the drilling, I then used this tool to carefully pry the belly pan away from the chassis without bending it because I am planning on using the belly pan as a template for a new belly pan.


I actually used this tool to sheer some of the rivets that I didn't loosen enough with the drill.  Finally the belly pan was seperated from the chassis. 


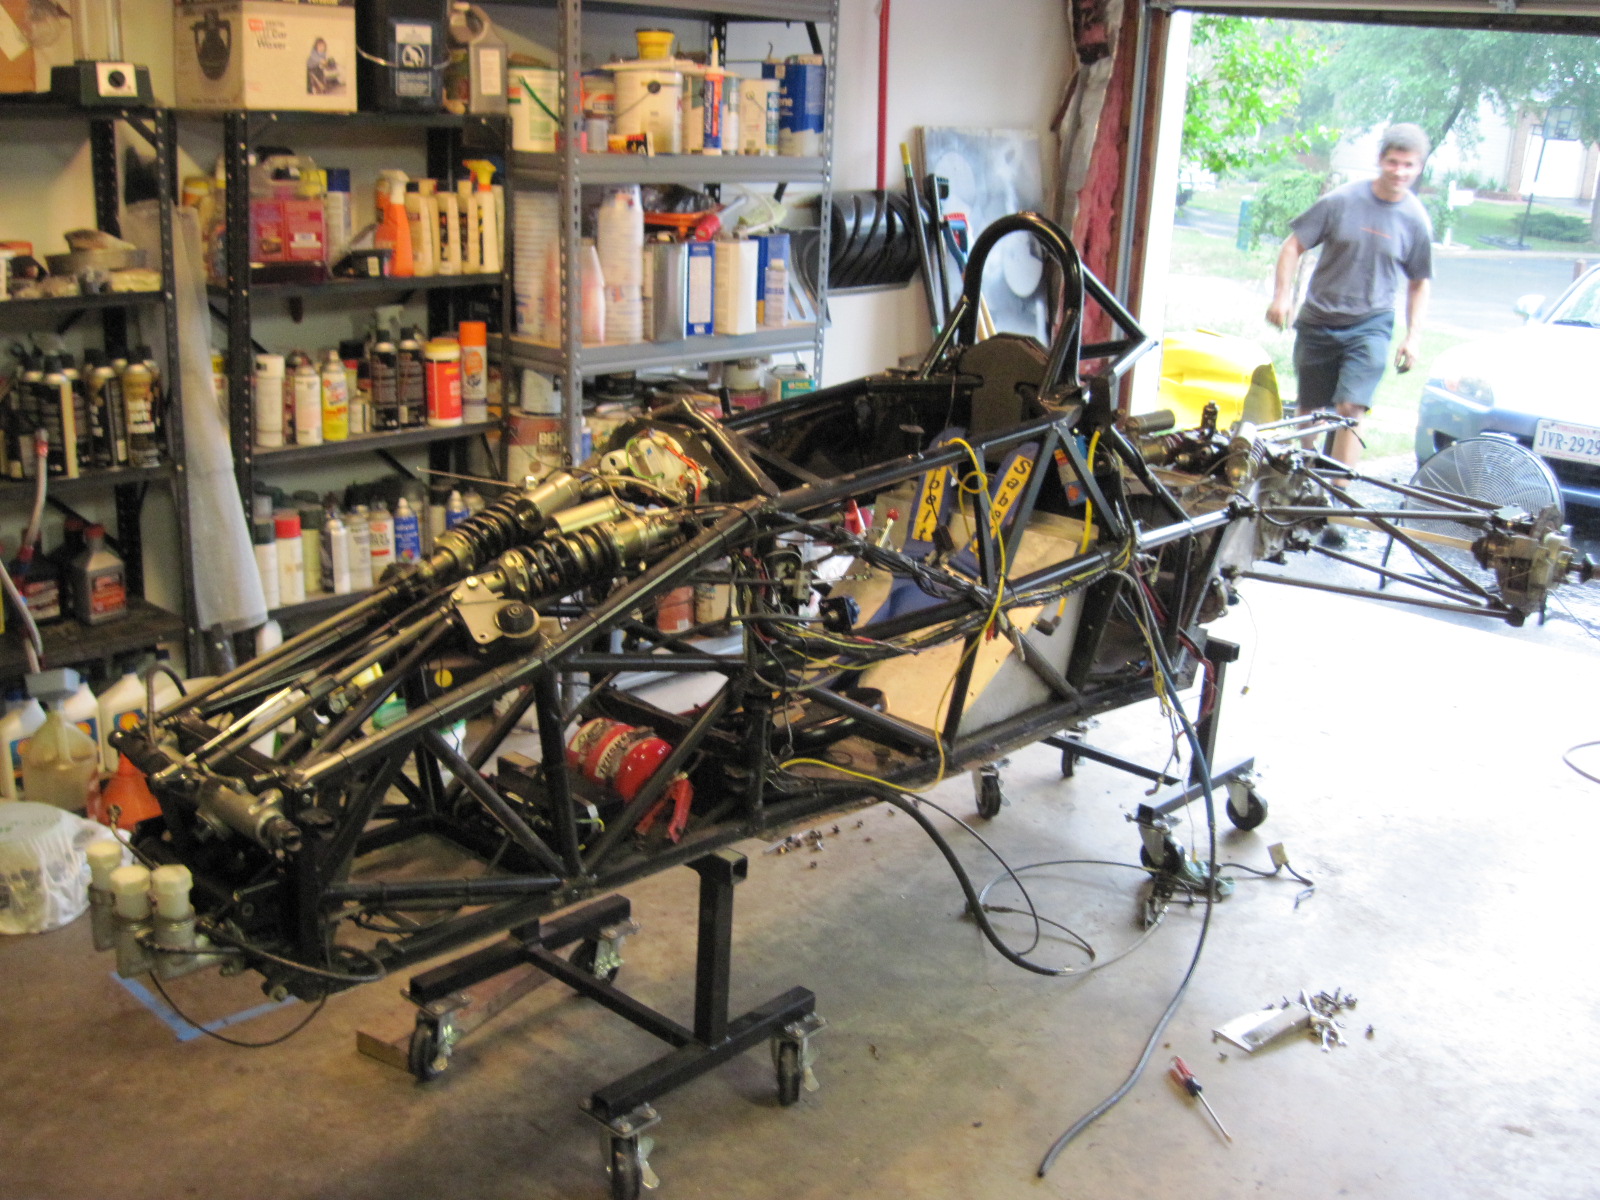
And now the discovery process continues.  Even though I was careful about not distorting the holes in the chassis, the person installing this belly pan wasn't so careful.  A number of the holes are oblong and a lot of them are quarter inch.  Plus there was a lot of oil in between the frame and the belly pan at the back end of the car and there was rust between the belly pan and the chassis at the front of the car so the belly pan was not doing everything it was supposed to be doing and I'm really glad that I took it off!!


The next step was to get rid off the remaining adhesive so I used a grinder with a wire wheel and it worked like a charm.  Here is the back end of the car and the front after being cleaned up.


As you can see, it ain't perfect but as Eric said, this is all pretty typical of a 14 year old race car and everything can be fixed.  Eric is going to look at it at his shop and we will figure the best path to go with the belly pan.  He may end up welding a new one on which means I wouldn't have to deal with all the issues with the holes in the chassis.  Of course the issue with that is that it won't be so easy to remove it if needed! 


Sunday, July 24, 2011

The Dismantling Continues!

It was another hot morning in the garage but I wanted to get the car to the point where I could remove the belly pan -- which I did.  I continued to work my way to the back of the car and removed the coil, shift linkage, fuel cell cover, etc.  Here is a pic of the fuel cell. 


I noticed that there was a lot of sand and dirt around the sides of the fuel cell, especially on top of the belly pan that extends past the frame.  This is a sure sign of fluid gathering in those areas.  After I got the fuel cell out, I realized why that was the case -- it had been leaking.  Looks like I will be buying a new fuel cell which is not a big surprise.


Notice how the duct tape at the bottom of the firewall is coming off -- another sign of a fuel leak.  When expecting the cell I found green discoloration of the cell.  Definitely time for a new cell  -- that won't be cheap!


Here is a pic of the fuel cell area with the duct tape removed and cleaned up a little bit.


Time to move to the engine bay and the rear suspension.  I removed the fire retardant material that was on some of the tubing that was next to the exhaust.  It was not only safety wired on but also glued on with hi-temp silicone.  The material was not easy to get off and as you can see there is still lots of hi-temp silicone left.


All those tubes are probably going to get cut off anyway so I don't plan on removing the silicone.  I then removed the shocks and the other rear suspension parts.  Here are a couple of before and after pics.


So, the easy stuff is done.  I plan on tackling the belly pan next weekend.  Here are a couple of pics of the frame after being cleaned up.


And probably one of the most important tasks -- I made room for my street car!

Saturday, July 23, 2011

A HOT Morning In The Garage

Based on the forcast for it being a 100 degree day, I knew that it was going to be a VERY HOT day in the garage so I got up just before 6 am (the cats helped in that area) and got in the garage by 7 am.  It was already 80+ degrees so it didn't take long to get over 90.  I turned on two fans and got busy taking more stuff of the car.  I wanted to get the steering sensor re-installed just to make sure there wasn't any issues with it.  First I had to disconnect the front sway bar and then I removed the steering rack.

Here are a couple pics of the steering rack.  The first pic shows where it mounts and the 2nd pic shows it mounted.  The black piece of rubber in the center rotates and the sensor is mounted such that it pushes up against the rubber piece.


I tested the sensor again after it was mounted and it seems to work fine.

Everything mounted to the belly pan has to come out because I have to take the belly pan off at some point.  Plus I want to look everything over and learn how everything mounts so I figured I would start at the front of the car and work my way back.

Here is a pic of the front of the car with the sway bar and steering rack removed.


There are a lot of washers being used as spacers on those master cylinders.  I think I will have someone make some spacers for me.

Front without the master cylinders:


Notice the paint coming off the bottom of the front panel -- I might try to find someone to powder coat it.

The front without the panel:


I also removed all the pedals and found this issue with the brake pedal.  The brake balance bar got out of alignment at some point and pushed up against the edge of the tube that it sits in.  Not a big issue but I will get it fixed anyway.


I then removed the front shocks the rockers, and the fire extinguisher.  Here are before and after pics.


Notice all the sand where the battery sat.  I'm guessing that was from Roebling Road in Savannah.  I know I have collected a lot of sand there! :>)

Sunday, July 17, 2011

July 17th -- Steering Sensor

Even though my main focus was to post as much as I could on ebay today, I had to do something with my hands!  The VD had a number of AiM sensors installed but most of them I don't need because the Honda engine will have an ECU that will give me a number of data signals including throttle, oil pressure, and oil temperature.  I am going to sell the AiM XG Log system that I had in my FV because it is not expandable and I am probably going to get an AiM EV04 system because it is expandable and it has some additional features that I like.  I had a steering sensor in my FV but the VD has a steering sensor installed in the steering rack which is really nice because I won't need to install a pulley on the steering shaft and create a bracket to hold the sensor.  The problem is the wires going to the VD steering sensor were pulled away from the sensor so I wanted to see if I could get it working again.  First, I tested it with an Ohm meter to make sure it is still good -- which it is.  Then, I re-soldered the wires to it.  In order to prevent the wires from pulling away from it again, I covered the wires at the solder points with 5 minute epoxy.  It isn't pretty but it should work just fine now!


Saturday, July 16, 2011

July 16th -- Continuing the Dismantling

Earlier this week I removed the wiring for the data system and the wiring harness for the radios.  Today I got the gauges out of the VD as well as the switches and brake/clutch lines.  My main focus right now is to sell as much as I can and I can definitely sell the gauges (since I will be using a data acquisition system with a display) so I took pictures of those.  However, most of my time seemed to be spent making a stand for the engine to sit on and dismantling the suspension further so that I could store them better and make a little more room in the garage.  Hopefully the engine sells soon because as soon as it does, I will be ordering the engine kit from Honda.  Tomorrow I will be focused on listing as much as I can on ebay.  I still have lots of FV stuff to sell and a lot of it is small and can be shipped easily so that is what I will be listing.  Every little bit helps!!


The Dismantling of the RF97 VD FC -- 7/13/11

Since all of my racing experience has been with Formula Vees, I know very little about the RF97 so I requested help from one of the most knowledgeable individuals in regards to Van Diemens and that is Eric Langbein of Eric Langbein racing.  Eric came to my house on July 13th so that we could go through the car and at the very least pull the engine out so that I can place it for sale.  We not only got the engine out but we got all the bodywork off the car and all the suspension off the car.  Since we made that much progress, I already feel more comfortable with the new car.  Thanks Eric!!  After we got the suspension off we were able to put the car on roll around stands that I bought from a friend of mine.  Those things are really going to be a big help!  Below are pictures documenting the progress.